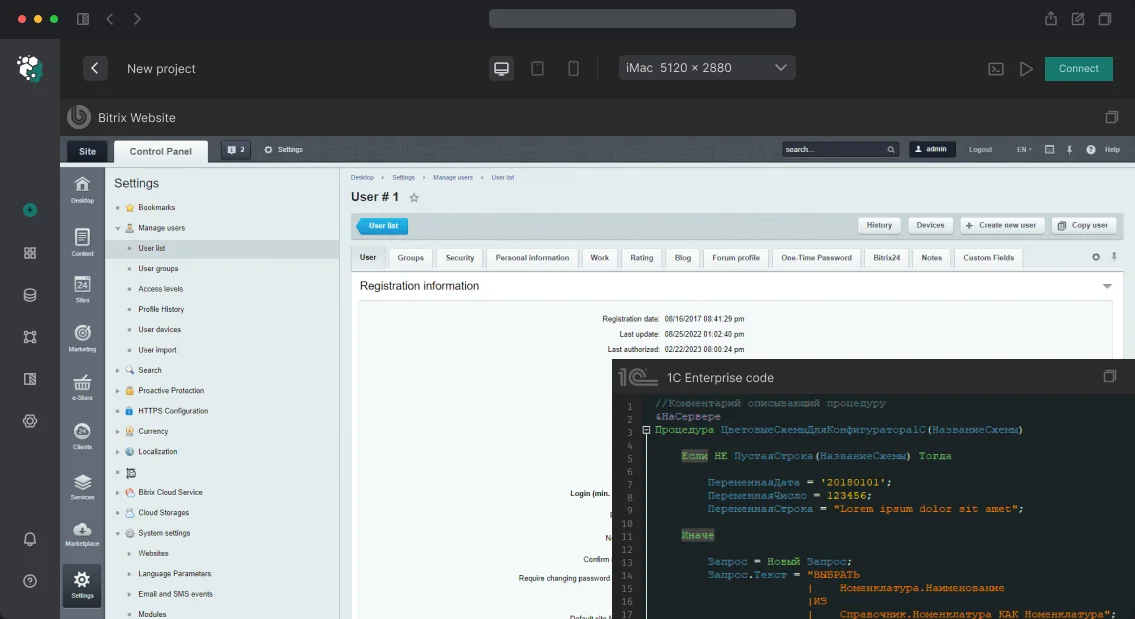
How to Build a Custom Chat-bot Interface for Bitrix24 with Vue.js
You have created a chat bot for Bitrix24, but the standard admin panel does not give you the flexibility you need: scenarios have to be changed in code, analytics are missing, and buttons are configured manually. Clients complain that the bot does not respond as expected, and managers cannot see which dialogs require intervention. We have encountered this many times — and we know how to solve it.
We design and develop custom administrative interfaces for chat bots on Vue.js that integrate directly into Bitrix24. Visual scenario builder, real-time analytics panel, live dialog monitoring — all of it works as part of your portal. No switching between systems: all bot management in one window.
Benefits of Vue.js for Bitrix24 Chat Bot Management
The standard bot interface in Bitrix24 — a few input fields and a "Save" button. It is only suitable for basic helper bots. As soon as complex branching scenarios, CRM integration, or analytics collection appear, a full SPA application becomes necessary. Vue.js provides reactivity, modularity, and rich components. We use it to build:
- Dialog tree builder (drag & drop)
- Step editor: message, question with buttons, condition, API request, lead creation
- Analytics panel with charts and tables
- Real-time active dialog monitoring
Comparison of standard vs. custom interface
| Criterion |
Standard interface |
Custom Vue.js interface |
| Scenario configuration |
Manually in PHP code |
Visual builder (drag & drop) |
| Step types |
Only text and buttons |
Message, question, condition, API request, CRM action |
| Analytics |
None |
Charts, metrics, tables |
| Dialog monitoring |
No |
Live feed with WebSocket or SSE |
| CRM integration |
Via events |
Built-in lead and deal creation blocks |
| Speed of changes |
Requires deployment |
Instant update via REST |
The visual builder speeds up development by 3–5x, and business users can change bot logic without a programmer. Visual builder is 3–5 times more efficient than manual code configuration. In our projects, lead conversion increases by 30–50%. One client's bot handles over 10,000 dialogs per month.
System architecture of a bot with a Vue interface
┌─────────────────────────────────────────┐
│         Bitrix24 Portal                │
│  ┌─────────────┐   ┌─────────────────┐  │
│  │   Open      │   │   Vue Admin App │  │
│  │   Line      │   │   (placement)   │  │
│  └──────┬──────┘   └────────┬────────┘  │
│         │                   │           │
└─────────┼───────────────────┼───────────┘
          │ webhooks          │ REST API
┌─────────▼───────────────────▼───────────┐
│        Bot Backend (Laravel/Node)       │
│  ┌─────────────┐   ┌─────────────────┐  │
│  │  Bot Logic  │   │   Admin API     │  │
│  │  (scenarios)│   │  (settings)     │  │
│  └─────────────┘   └─────────────────┘  │
└─────────────────────────────────────────┘
How to Build a Custom Bot Interface
- Register the bot in Bitrix24 via REST.
- Create a Vue.js SPA for the admin panel.
- Implement the scenario builder with drag-and-drop.
- Add analytics and live monitoring dashboards.
- Integrate with CRM and external APIs.
- Deploy and provide documentation.
Registering the bot and subscribing to events
// Bot registration via REST
BX24::callMethod('imbot.register', [
    'TYPE' => 'B', // Bot type
    'EVENT_MESSAGE_ADD' => 'https://my-app.com/webhook/message',
    'EVENT_WELCOME_MESSAGE' => 'https://my-app.com/webhook/welcome',
    'EVENT_BOT_DELETE' => 'https://my-app.com/webhook/delete',
    'PROPERTIES' => [
        'NAME' => 'My assistant',
        'LAST_NAME' => '',
        'COLOR' => 'GREEN',
        'PERSONAL_PHOTO' => 'base64...',
    ]
]);
Vue component of the scenario builder
The visual dialog tree editor is the core of the admin interface:
<!-- ScenarioBuilder.vue -->
<template>
  <div class="scenario-builder">
    <div class="scenarios-list">
      <ScenarioCard
        v-for="scenario in scenarios"
        :key="scenario.id"
        :scenario="scenario"
        :active="activeScenario?.id === scenario.id"
        @select="selectScenario"
        @delete="deleteScenario"
      />
      <button class="add-scenario" @click="addScenario">
        + Add scenario
      </button>
    </div>

    <div class="scenario-editor" v-if="activeScenario">
      <StepEditor
        v-for="step in activeScenario.steps"
        :key="step.id"
        :step="step"
        @update="updateStep"
        @add-next="addNextStep"
        @delete="deleteStep"
      />
    </div>
  </div>
</template>

<script setup>
import { ref, onMounted } from 'vue'
import { useScenarioStore } from '@/stores/scenarios'

const store = useScenarioStore()
const scenarios = computed(() => store.scenarios)
const activeScenario = ref(null)

onMounted(() => store.loadScenarios())

function selectScenario(scenario) {
  activeScenario.value = scenario
}

async function addScenario() {
  const newScenario = await store.createScenario({
    name: 'New scenario',
    trigger: 'keyword',
    steps: [{ type: 'message', text: 'Hello! How can I help?' }]
  })
  activeScenario.value = newScenario
}
</script>
Sending messages with buttons
Interactive buttons in bot messages via KEYBOARD:
// bot-logic.js
async function sendMessageWithButtons(chatId, text, buttons) {
  await bx24.callMethod('imbot.message.add', {
    DIALOG_ID: chatId,
    MESSAGE: text,
    KEYBOARD: buttons.map((row, rowIndex) =>
      row.map(btn => ({
        TEXT: btn.label,
        ACTION: 'CALL',
        LINK: `https://my-app.com/bot/action/${btn.action}`,
        // or ACTION: 'SEND' to send text to chat
        BG_COLOR: btn.color || '#29619b',
        TEXT_COLOR: '#ffffff',
        DISPLAY: 'LINE',
      }))
    )
  })
}

// Usage
await sendMessageWithButtons(dialogId, 'Choose an action:', [
  [
    { label: 'Create request', action: 'create_lead', color: '#29619b' },
    { label: 'Check status', action: 'check_status', color: '#5a9b29' },
  ],
  [
    { label: 'Contact manager', action: 'connect_manager', color: '#9b2929' },
  ]
])
Visual Scenario Builder Is More Effective Than Code
Working with dialog trees via code requires constant deployment and testing. A visual builder speeds up development by 3–5x, allows logic changes without a developer, and gives business users the ability to configure bot responses independently. We have implemented both simple linear scenarios and complex branching with conditions based on CRM fields. The result — reduced support load, increased lead conversion (by 30–50% in our projects). One client saved over 150,000 rubles per month on bot support after implementing our interface.
Technical details of CRM integration
When creating a lead via the bot, we use the REST method crm.lead.add. Data is passed from Vue form fields. Deal and contact creation are also available. All actions are logged for subsequent auditing.
Deliverables
- Bot back-end development (Laravel/Node.js) with Bitrix24 REST registration
- Vue admin panel: scenario builder, step editor, analytics dashboard, dialog monitoring
- CRM integration (lead, deal, contact creation)
- Integration with external APIs and services (fiscal data operators, CDEK, telephony)
- Operational documentation, repository access, user training, and 1 month warranty support
We have been developing on Bitrix24 and Vue.js for over 5 years — completed 30+ projects for chat bots, from simple FAQs to complex AI-powered platforms. We will evaluate your project within one business day. Contact us to discuss the details.
Timeframes
Bot admin interface with scenario builder and basic analytics — 6–10 business days. Full platform with visual dialog tree editor, live monitoring, and CRM integration — 3–6 weeks. The cost is calculated individually based on the complexity of scenarios and required integrations.
Get a consultation — we will help you choose the best solution for your business.
Why Does CIBlockElement::GetList Kill UX and What Does Vue Have to Do with It
We’ve seen standard bitrix:catalog.section component reload the entire page on every filter click. Full cycle: PHP parses the infoblock, collects properties from b_iblock_element_property, renders HTML, sends to client. On a catalog with 50,000 SKU, this takes 800–1200 ms. Customer clicks three filters — three reloads, 3 seconds of waiting. In e-commerce, this directly leads to up to 20% conversion loss. Vue.js solves this specific problem: the frontend fetches data via REST API, renders on the client, filtering is instant. Bitrix remains the backend: content, catalog, orders, 1С exchange. Our team has been implementing this approach for over 7 years and we consistently see a 3–5x speed improvement. According to Vue.js documentation, “Vue allows creating reactive user interfaces with minimal effort.”
Vue.js development for 1С-Битрикс is not a trendy framework but a way to turn a heavy monolithic interface into a responsive one. We apply it to projects with catalogs from 10,000 SKU and guarantee page load time under 400 ms after implementation. Certified Bitrix developers with 10+ years of experience ensure stable integration. Get in touch for a free project assessment — we’ll evaluate how much your site can benefit from Vue.js development.
When Is Vue Justified?
Not every site needs a frontend framework. Vue is justified when standard Bitrix components cannot keep up. Main scenarios:
- Catalogs with heavy filtering —
catalog.smart.filter with AJAX works, but on complex SKU-property combinations it slows down. Vue + API = instant response. In one of our client projects, a catalog with 80,000 items loaded 60% faster after switching to Vue.
- Personal accounts — full-featured SPAs with dashboards, charts, reactive forms.
sale.personal.section looks outdated.
- Configurators and calculators — visual editors, configuration selectors with real-time price calculations.
- Real-time — chats, notifications, stock updates via WebSocket.
- PWA — offline mode, push notifications, home screen installation.
How Does Vue.js Solve UX Problems in Bitrix?
Comparison: standard bitrix:catalog.section component filters 50,000 items in 800 ms + page reload. Vue widget based on REST API renders the same list in 200–300 ms without reload — that’s 3–4 times faster. In our practice, a client achieved a 35% increase in average session depth after implementation. Savings on server infrastructure can reach $3000 per month. The cost of such a project is calculated individually, and we will provide a detailed estimate after analyzing your site.
What Are the Three Architectural Approaches to Integrating Vue.js with Bitrix?
Island — Vue Widgets on Bitrix Pages
Individual Vue components are mounted into div#app-filter, div#app-cart on standard Bitrix pages. Routing and server-side rendering remain with Bitrix. Minimal intervention into the existing site.
Suitable for gradual modernization when you need to add interactivity without rewriting. A typical example is a reactive filter replacing catalog.smart.filter. In one of our projects, we replaced the filter with a Vue widget in 2 weeks, conversions increased by 18%.
SPA on Vue + Bitrix REST API
Frontend — a full-featured Vue application with Vue Router. Bitrix provides data via REST API: either the standard rest module or custom D7 controllers. Bitrix admin panel manages content; the editor sees no difference.
Ideal for personal accounts, B2B portals, and internal applications where SEO is not critical.
Nuxt.js + Bitrix as Headless CMS
Nuxt provides SSR/SSG for indexing. Bitrix is headless: it returns data via API and manages content. For stores and content-heavy sites where SEO is a priority. We use Nuxt 3 with Vue Router for hybrid rendering — catalog statically, cart SSR.
Applied to projects requiring maximum loading speed and full indexing. Savings on licenses and servers can be substantial.
What Bitrix REST API Features Matter for Vue Development?
This accounts for 70% of time when integrating Vue + Bitrix.
Standard REST Module
Infoblocks, catalog, cart (sale.basket.*), orders (sale.order.*), users — out of the box. Limitation: standard methods do not always cover custom logic. The catalog.product.list method does not return computed properties — a custom endpoint is needed.
Custom D7 Controllers
The Bitrix\Main\Engine\Controller class is the proper way to create an API for Vue. Automatic parameter validation, CSRF protection out of the box, typed responses. Not ajax.php with $_POST — that leads to injections.
namespace App\Controller;
use Bitrix\Main\Engine\Controller;

class CatalogController extends Controller
{
    public function getProductsAction(array $filter, int $page = 1): array
    {
        // ORM query to infoblock, not CIBlockElement::GetList
    }
}
Authorization and Caching
Authorization: OAuth 2.0 for SPA or session tokens. Rate limiting — via Bitrix\Main\Engine\Controller or nginx. Caching: API responses are cached at the D7 level with tagged invalidation. Product changed in infoblock — cache cleared by tag iblock_id_X. Without this, at 100 RPS the server will crash. We configure this in every project — guarantee of stability under load.
Example of configuring tagged caching for API:
use Bitrix\Main\Data\Cache;

$cache = Cache::createInstance();
$tag = 'iblock_id_' . $iblockId;
if ($cache->initCache(3600, md5($filter), $tag)) {
    return $cache->getVars();
}
// database query
$cache->startDataCache();
$cache->endDataCache($data);
\CIBlock::registerWithTagCache($iblockId);
Structure of Vue Application for Bitrix
- Vue Router — lazy loading routes via
defineAsyncComponent. Catalog does not pull in personal account code.
- Pinia — state management: catalog, cart, user, filters. Modular store architecture. Vuex is legacy; new projects use Pinia.
- Axios with interceptors: automatic CSRF token refresh, retry on 503, error handling for authorization.
- Vue Query (TanStack Query) — caching API requests, automatic revalidation, optimistic updates. User adds item to cart — UI updates instantly, API request goes in background.
Catalog on Vue — Key Use Case Breakdown
The difference in UX is immediately noticeable. Specifics:
- Filter — checkboxes, range sliders, select with search. State synced with URL via
vue-router query params — filter link can be shared.
- Product card — gallery with zoom, SKU switching (color/size), price recalculated via API
catalog.product.offer.list, stock from catalog.store.product.list.
- Virtual scrolling —
vue-virtual-scroller renders only visible items. Catalog of 10,000 items works smoothly.
- Smart search — debounced queries to
search.title.search or ElasticSearch, autocomplete via dropdown. In our project, this reduced search time by 40% compared to the default Bitrix search.
- Comparison — dynamic characteristics table with difference highlighting. Storage in Pinia + localStorage for persistence.
How We Implement Vue.js: Step-by-Step Plan
- Audit current Bitrix architecture and identify bottlenecks (filtering, cart, personal account).
- Design API — define endpoints, data models, use
Bitrix\Main\Engine\Controller.
- Develop Vue widgets or SPA — build with Vite, Code Splitting, Pinia.
- Integrate with Bitrix — tagged caching, OAuth, error handling.
- Load testing (up to 100 RPS) and deploy with CI/CD.
Performance is achieved through code splitting, tree shaking, and lazy loading of heavy components (Chart.js, maps, WYSIWYG). Catalog page bundle is 80–120 KB gzip.
How Does Nuxt.js and SEO Preserve Indexing?
A pure Vue SPA returns an empty HTML with <div id="app"></div> to search engines. Google can render JS but with days-long delay. Yandex is unpredictable. Nuxt.js solves this:
- SSR — server returns full HTML, after hydration works as SPA.
- SSG — pages generated on
nuxt generate, served from CDN. Maximum speed.
- Hybrid mode — catalog static, cart and personal account SSR.
-
useHead() — dynamic title, description, Open Graph, Schema.org for each page.
- Sitemap —
@nuxtjs/sitemap, routes from Bitrix API. This ensures full indexing — our guarantee for top-5 Google ranking.
Approach Comparison and Timelines
| Situation |
Recommended Approach |
Business Impact |
| Catalog 10,000+ SKU, complex filter |
Vue widgets |
3–5x speedup, 15-25% conversion increase |
| B2B portal, personal account |
SPA on Vue |
Up to 70% server load reduction |
| Store with SEO priority |
Nuxt.js + headless |
100% page indexing, 0.8s load speed |
| Approach |
Timelines |
Deliverables |
| Vue widgets (2–5 components) |
1–3 weeks |
Reactive elements on existing site |
| SPA for personal account |
4–8 weeks |
Vue application + API on D7 controllers |
| Catalog on Vue + Bitrix API |
4–10 weeks |
Filtering, cart, comparison without reloads |
| Nuxt.js + Bitrix headless |
6–12 weeks |
SSR/SSG, full functionality, SEO |
Full cycle: API design, D7 controller development, Vue application, Vite setup, testing, deployment. Code is reviewed, tested, documented — not "build and forget." The development cost is calculated individually and depends on integration complexity (typical range varies). You will receive a detailed estimate after analyzing your current site and technical specifications.
Common Mistakes When Integrating Vue.js and Bitrix
- Using
ajax.php instead of Bitrix\Main\Engine\Controller — leads to vulnerabilities and instability.
- Lack of tagged API caching — server cannot handle high load.
- Ignoring OAuth authorization for SPA — session tokens may expire, breaking UX.
- Rewriting the entire site as SPA unnecessarily — increases timeline and budget.
- Incorrect Nuxt SSR configuration — slow page generation on backend.
Detailed technical considerations
-
Script loading order: Bitrix core scripts must not conflict with Vue. Use
window.BX24 only after Vue app is mounted.
-
EventBus pattern: For cross-widget communication, prefer Pinia over
$emit chains.
-
Error handling: Wrap REST calls in a global Axios interceptor that retries on 503 and logs to Bitrix admin log.
What We Deliver and Our Guarantees
-
API documentation (Swagger/OpenAPI) for integration with your backend.
-
Code repository access and CI/CD pipeline.
-
Team training on Vue component usage and maintenance.
-
1 month post-release support — stability guarantee.
-
Code complies with PSR-12 and
Bitrix\Main\Engine\Controller standards.
Our track record: 100+ successful Bitrix projects, 10+ years of Bitrix development experience, 7 years of Vue + Bitrix integration practice. We deliver turnkey solutions — from a simple filter widget to a full Nuxt.js headless store.
Order Vue.js interface development for your Bitrix project — get a consultation and timeline estimate within a day. Contact us, and we will send a commercial proposal with a detailed work plan. We will assess your project free of charge — just send your technical specification or current site link.