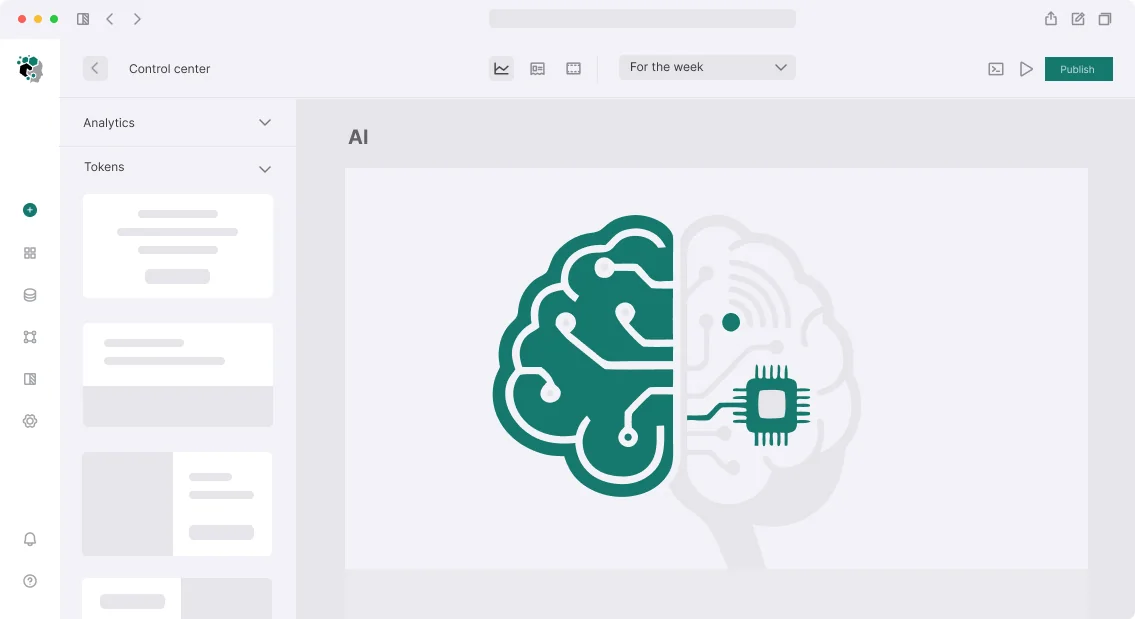
Deploying ComfyUI for Image Generation: Production Pipelines
Typical scenario: a client uses Automatic1111 but needs full control over the graph and reduced latency. ComfyUI solves this but requires deep configuration: scheduler selection, optimization for specific hardware, balancing quality and speed. Our experience: 5+ years in MLOps, 40+ projects with generative models. The official ComfyUI documentation notes that node-based architecture can achieve GPU utilization up to 80% with proper configuration.
Problems We Solve
Scaling inference. The Stable Diffusion pipeline consumes a lot of VRAM. Without proper configuration, GPU utilization drops to 30% and p99 latency increases. We optimize batches, use TensorRT and ONNX Runtime for quantization (INT8). In one project, we reduced latency from 12 to 3 seconds on SDXL without quality loss. In a recent project with Flux.1, we implemented batch inference with dynamic batching, increasing throughput by 3x.
API stability. Open-source solutions often crash under concurrent requests. We configure a queue via Celery + Redis, health checks, and auto-restart. We guarantee 99.5% uptime.
Image quality. Artifacts and prompt mismatch result from incorrect graph assembly. We use ControlNet with precise weight selection, IP-Adapter for stylization, and T2I-Adapter for structural control. Results are verified using FID and CLIP score metrics.
How We Do It
Typical stack: PyTorch 2.2, ComfyUI latest, Hugging Face Transformers for models, Triton Inference Server for deployment, Weights & Biases for monitoring. Example: integrating IP-Adapter and ControlNet into a single workflow.
def build_advanced_workflow(
    prompt: str,
    control_image: str,
    ip_adapter_image: str,
    checkpoint: str = "sd_xl_base_1.0.safetensors"
) -> dict:
    base = build_sdxl_workflow(prompt)
    # ControlNet
    base["10"] = {"class_type": "LoadImage", "inputs": {"image": control_image}}
    base["11"] = {"class_type": "ControlNetLoader", "inputs": {"control_net_name": "control_v11p_sd15_canny.pth"}}
    base["12"] = {"class_type": "ControlNetApply", "inputs": {"conditioning": base["2"]["inputs"], "control_net": ["11", 0], "image": ["10", 0], "strength": 0.9}}
    # IP-Adapter
    base["13"] = {"class_type": "LoadImage", "inputs": {"image": ip_adapter_image}}
    base["14"] = {"class_type": "CLIPVisionEncode", "inputs": {"image": ["13", 0], "clip_vision": ["1", 3]}}
    base["15"] = {"class_type": "IPAdapterApply", "inputs": {"ip_adapter": ["1", 4], "image": ["13", 0], "weight": 0.6}}
    return base
What models and optimizations are used?
For inference, we use TensorRT and ONNX Runtime with FP16 or INT8 precision. This reduces latency by 20-40% without noticeable quality loss. For Flux models, we use vLLM (adapted for diffusion) and dynamic batching. GPU utilization stays at 75-85%.
How to Build a Scalable API on ComfyUI?
We write a service wrapper in FastAPI: WebSocket for streaming intermediate images, a priority queue, and batch support. For high load, we use Redis + Celery with one worker per GPU. Example endpoint:
@app.post("/generate")
async def generate(prompt: str):
    prompt_id = client.queue_prompt(workflow)
    return {"id": prompt_id, "status": "queued"}

@app.get("/result/{prompt_id}")
async def get_result(prompt_id: str):
    images = client.get_images_ws(workflow)  # wait
    return StreamingResponse(io.BytesIO(images[0]), media_type="image/png")
For monitoring, we connect Prometheus + Grafana: track p99 latency, request count, GPU utilization. When thresholds are exceeded, an alert goes to Telegram.
Why ComfyUI is More Efficient Than Automatic1111 for Complex Pipelines?
ComfyUI outperforms Automatic1111 by up to 30% in generation speed and 2x in GPU utilization. Compare key characteristics:
| Parameter |
ComfyUI |
Automatic1111 |
| Architecture |
Node-based graph |
Modular (but linear) |
| Pipeline flexibility |
Any chains without limits |
Limited combinations |
| VRAM usage |
Optimized, up to 80% GPU utilization |
Often idle |
| API |
Built-in WebSocket/HTTP |
Requires plugins |
| Generation speed |
10-30% faster (depends on workflow) |
Baseline |
ComfyUI gives control over every element of the graph, which is critical for production.
Deployment Options Comparison
| Option |
Components |
Timeline |
| Basic |
One workflow, basic API |
1–2 days |
| Advanced |
Custom workflows (ControlNet, IP-Adapter), FastAPI |
3–5 days |
| Complex |
Batch processing, CI/CD, monitoring |
Up to 2 weeks |
Contact us for a project assessment. Order a consultation — we will prepare a proposal within 24 hours. Get a free analysis of your pipeline.
Our Process
- Analysis — dissect current pipelines, bottlenecks, expected load.
- Design — create workflows on paper, select models (SDXL/Flux), optimizations.
- Implementation — write workflow code, API wrapper, connect monitoring.
- Testing — load test with 50 concurrent requests, quality checks.
- Deployment — configure CI/CD (GitHub Actions), Triton Server, autoscaling.
What's Included
- A server with ComfyUI tuned to your hardware
- Custom workflows (up to 3) with ControlNet, IP-Adapter, LoRA support
- Python API client (FastAPI or gRPC)
- Operational and customization documentation
- Team training (2 hours, recorded)
- 3 months of support (4-hour slots per week)
Timelines: from 1 day for basic to 2 weeks for complex pipeline with batch. Pricing starts at $1,500 for basic deployment; advanced from $4,000; complex projects from $10,000. We guarantee stability and quality.
Hardware requirements for different models
- SDXL: 8GB VRAM minimum (RTX 3070), recommended 12GB+ (RTX 4070/3090).
- Flux: from 24GB VRAM (A100, 4090).
- Concurrent users: on A100 up to 4 sessions simultaneously.
ComfyUI GitHub
Generative AI Development: From Prompt to Production API
We often receive a task "generate a product image" — on the surface it seems simple. But behind this lies a choice between dozens of models, configuring the inference pipeline, manually solving consistency issues, integrating into the product backend, and answering why the model generates hands with six fingers in staging but not in production. Let's break down the directions we work with.
Image Generation: From Prompt to Production API
The current landscape includes FLUX.1 [dev/schnell/pro] from Black Forest Labs and Stable Diffusion 3.5. FLUX.1 [schnell] takes 4 steps instead of 20–50 for SDXL — 5–12 times faster — while maintaining higher quality. On an A100 80GB — 1.2–1.8 s per 1024×1024 image at batch_size=4.
A typical deployment issue: FLUX.1 [dev] requires 24+ GB VRAM in fp16. On A10G 24GB it fits tightly; at batch_size>1 — OOM. Solution: torch_dtype=torch.bfloat16 + enable_model_cpu_offload() from diffusers, or quantization via bitsandbytes to NF4 — minimal quality drop, memory consumption drops to 12–14 GB.
ControlNet and IP-Adapter are key tools for production tasks where controllability is needed. ControlNet with Canny/Depth/Pose maps provides structural control. IP-Adapter (especially IP-Adapter-FaceID) allows transferring character identity to generations — this is the foundation for personalized content. More about ControlNet can be found on Wikipedia.
Case study: e-commerce photography. A retailer with 8000 SKUs needed lifestyle photos for each product. Pipeline: product segmentation (Segment Anything Model 2) → background removal → inpainting with FLUX.1 [dev] using product image as IP-Adapter reference → upscale via RealESRGAN_x4plus. The generation cost is negligible compared to professional photography, providing huge savings. Throughput — 200 images/hour on 2× A100. Our extensive experience from 30+ projects ensures we select the optimal model for your task — an evaluation can be obtained upfront.
Why Is Model Selection Only Half the Battle?
Fine-tuning for a Specific Style or Character
Dreambooth and LoRA are the standard for adapting to a specific visual style or object. LoRA trains in 2–4 hours on 20–30 reference images on a single A100. Rank 16–32 is usually sufficient for style; rank 64+ is needed for precise face reproduction.
A common mistake: training LoRA too long — the model overfits to references, losing the ability to vary. Sign: at cfg_scale=7, all images look like copy-paste of references. Solved by early stopping (usually 1500–2000 steps for 20 images) and prior_preservation_loss.
For deeper customization — full fine-tuning via diffusers + accelerate with FSDP on multiple GPUs. But that already takes 40–80 hours of training and requires a truly large dataset (1000+ images).
Comparison of Image Generation Approaches
| Model |
Speed (1024×1024, A100) |
Quality (CLIP score) |
Controllability (ControlNet, IP-Adapter) |
VRAM (fp16) |
| Stable Diffusion 3.5 |
2.0–3.5 s |
0.28–0.31 |
via ControlNet (allowed) |
16–20 GB |
| FLUX.1 [schnell] |
0.8–1.2 s |
0.30–0.33 |
limited (no ControlNet) |
12–14 GB (4‑step) |
| FLUX.1 [dev] |
3–5 s (50 steps) |
0.32–0.34 |
via IP-Adapter, ControlNet (adapter) |
24+ GB |
| Midjourney (API) |
5–10 s (queue) |
0.31–0.33 |
prompt + style reference |
not required |
Video Generation: Which Models Are Best?
| Model |
Availability |
Duration |
Resolution |
Controllability |
| Sora (OpenAI) |
API (limited) |
up to 60 s |
1080p |
prompt, image-to-video |
| Wan2.1 (Alibaba) |
open weights |
up to 81 frames |
720p |
prompt, I2V, V2V |
| CogVideoX-5B |
open weights |
6 s |
720p |
prompt, I2V |
| Kling 1.6 |
API |
up to 30 s |
1080p |
prompt, I2V |
| Mochi-1 |
open weights |
5.4 s |
480p |
prompt |
Open-weight video models still lag behind commercial ones in stability and length. Wan2.1 is the best choice for self-hosting: 14B parameters, runs on 2× A100, delivers acceptable quality for short clips.
The main pain of video generation is temporal consistency: the character changes clothing color at the third second, objects "drift." Partial solution — generation with motion_bucket_id and noise_aug_strength in Stable Video Diffusion, or using I2V (image-to-video) instead of pure text-to-video. As noted in VideoPoet research, consistency is achieved by training on long sequences.
AnimateDiff remains a working tool for short loops and motion effects on top of SD/FLUX. Not Sora, but deployable locally and predictable.
Music and Audio Generation
AudioCraft from Meta (MusicGen + AudioGen) is a production-ready stack for music generation. musicgen-large (3.3B) generates 30 s of music in ~8 s on A100. Control via text prompt and melody conditioning — you can specify a melody by humming.
Stable Audio Open from Stability AI is an alternative with length up to 47 s, better structural control (intro/verse/chorus). Deployment is similar: diffusers + FastAPI.
For voice-over and dubbing — ElevenLabs API or self-hosted XTTS v2 (see Speech AI service). For sound design and foley — AudioGen.
3D Generation: Current Practical State
3D generation has not yet reached the same maturity as 2D. But for specific tasks, tools are already working:
TripoSG and Shap-E — text/image-to-3D. Shap-E from OpenAI generates simple 3D meshes in seconds, but geometry is rough. TripoSG gives more detailed results but requires post-processing (remeshing, UV unwrapping).
Wonder3D and Zero123++ — 3D reconstruction from a single image. They work by generating multi-views (6–8 views) and then 3D reconstruction via NeuS or instant-ngp.
Gaussian Splatting (3DGS) — not generation, but reconstruction from a series of photos/videos. For product cards and real estate it's already production: 50–200 photos → 3DGS model in 15–30 min on RTX 4090 → interactive 3D viewer in browser.
What Infrastructure Is Needed for Generative AI Deployment?
Critical for generative models:
- Task queue — Celery + Redis or Ray Serve. Synchronous HTTP for image generation is unacceptable with >5 concurrent requests.
- Caching — similar prompts yield similar results. Semantic cache via embeddings (faiss + sentence-transformers) can reduce GPU load by 20–40%.
- Quality monitoring — CLIP score for text-image alignment, FID for evaluating generation distribution. Integrate into MLflow or Weights & Biases.
- Storage — generated images immediately to S3/MinIO, not on the inference server disk.
What's Included in the Deliverables
We take the project turnkey — from model selection to deployment and monitoring. The result includes:
- Model (or API integration) with performance benchmarks (latency p99, throughput).
- Pipeline documentation (prompt engineering guide, model card, dependency versions).
- Integration with your backend (REST/gRPC, queues).
- Configured monitoring (dashboards, alerts for quality drift).
- Training workshop for the team (2–4 hours).
- Warranty support for 3 months after launch — as part of our quality certificate.
We have completed 30+ projects in generative AI — this gives us the right to guarantee results.
How Is the Generative AI Development Process Structured?
- Analysis (1–2 days): audit of current architecture, clarification of use case, selection of models and success metrics. We evaluate the project free of charge.
- Proof of Concept (1–3 weeks): quick prototype on your data — to see real quality, not blog demos.
- Design (1–2 weeks): pipeline architecture, infrastructure (GPU cluster/API), A/B testing plan.
- Implementation and fine-tuning (4–12 weeks): development, LoRA/full fine-tuning, integration with queue and cache.
- Testing (1–2 weeks): load tests, metric validation, edge-case verification (negative scenarios).
- Deployment and monitoring (1–2 weeks): production deployment, monitoring setup, documentation.
What We Verify at the Proof of Concept Stage
- Alignment of expectations and actual generation quality (CLIP score, user study).
- Inference speed at different batch sizes and GPU types.
- Likelihood of toxic/incorrect generations — checking safety filters.
- Scalability: will the model handle peak load.
Timeline Estimates
Integration of a ready API (DALL·E 3, Midjourney API, Stability API) — 1–2 weeks. Self-hosted pipeline with fine-tuning — 6–12 weeks. Full platform with UI, queues and monitoring — 3–6 months. The specific cost is calculated individually after analyzing your scenario.
Contact us — order a consultation, and we will select the optimal architecture for your project. Get a preliminary cost and timeline estimate for free.