


Realistic Rigid Body Physics for Games: Destruction, Ragdoll, Cloth

Our video game development company runs independent projects, jointly creates games with the client and provides additional operational services. Expertise of our team allows us to cover all gaming platforms and develop an amazing product that matches the customer’s vision and players preferences.

From immersive apps to game worlds and 3D scenes

Our dedicated team for VR/AR/MR development, Unity production and 3D modeling & animation — with its own case studies and capability decks.

Visit the dedicated studio
Showing 1 of 1All 242 services
Realistic Rigid Body Physics for Games: Destruction, Ragdoll, Cloth
Complex
~5 days
Frequently Asked Questions

Our competencies

What are the stages of Game Development?

Latest works

  • image_games_mortal_motors_495_0.webp
    Game development for Mortal Motors
    1457
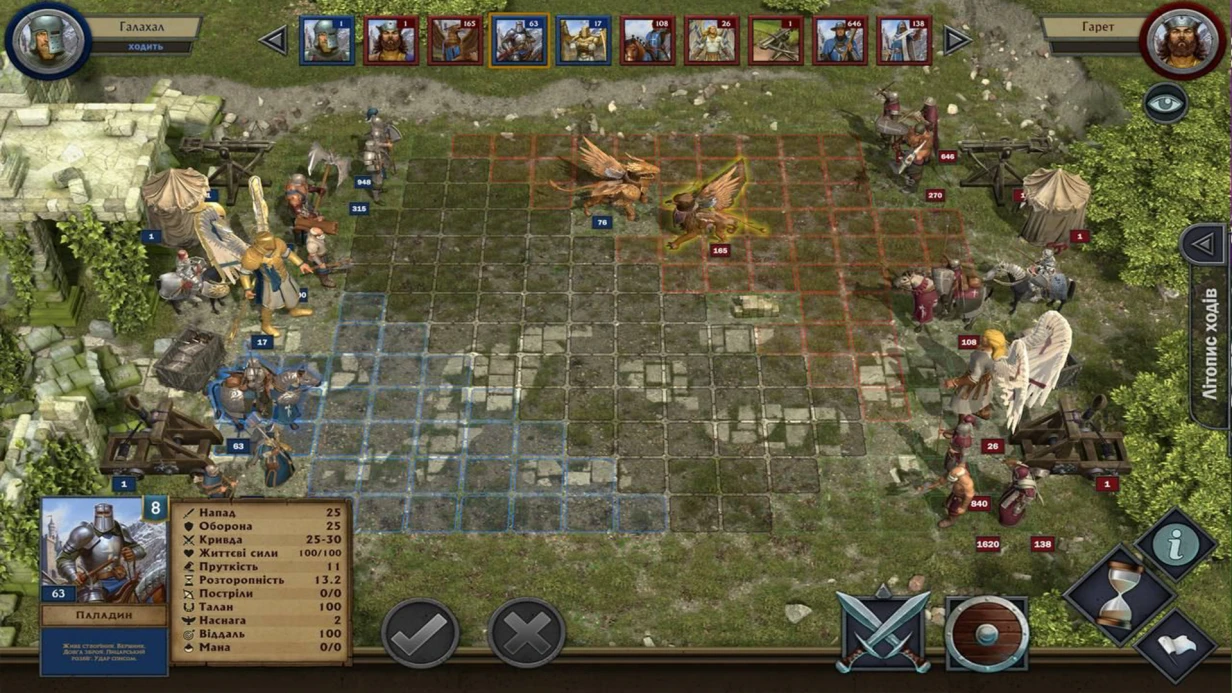
  • image_games_a_turnbased_strategy_game_set_in_a_fantasy_setting_with_fire_and_sword_603_0.webp
    A turn-based strategy game set in a fantasy setting, With Fire and Sword
    979
  • image_games_second_team_604_0.webp
    Game development for the company Second term
    605
  • image_games_phoenix_ii_606_0.webp
    3D animation - teaser for the game Phoenix 2.
    674
  • image_training-quizzes_kids_shopping_quiz_614_0.webp
    Educational quiz for kids "Shopping in a store"
    29

Building destruction in games often looks unnatural — stone chunks behave like cardboard boxes. Game physics for solids prioritizes visual plausibility over physical accuracy, with minimal computational cost. The difference is fundamental: PhysX SDK in Unity processes rigid body interactions in real time on the CPU; with 50 active Rigidbodies carrying mesh colliders instead of primitives, you can easily lose 10ms frame time just to physics in an empty scene. Our experience shows that correct architecture can save a project from failing its FPS budget. Debugging time savings can reach 40% of the development budget.

Need realistic destruction physics? Contact us for a consultation — we'll analyze your project in one day.

How does rigid body simulation affect performance?

Debris simulation during destruction is the most common task. A building explodes, pieces fly. The naive approach: fracture the mesh into parts, add a Rigidbody to each, activate on explosion. The problems become obvious after the first profiling.

Optimizing colliders: Mesh Collider vs primitives

A Mesh Collider on each fragment means convex mesh computation every FixedUpdate. For 20 fragments on GPU it's acceptable, for 200 — not. The correct solution is a compound collider from primitives (several Box Colliders or Capsule Colliders on one GameObject) approximating the fragment's shape. This is 5-10 times cheaper and visually nearly indistinguishable for fast-moving debris.

Collider Type Approximate CPU cost When to use
Mesh Collider (convex) 1x Few fragments (up to 20)
Mesh Collider (non-convex) 0.5x (static only) Static objects
Primitive compound 0.1x Debris, active objects

Sleeping. A Rigidbody enters sleep state when its velocity drops below Physics.sleepThreshold. Sleeping Rigidbodies consume no CPU. Critical: ensure sleepThreshold is not too low (default 0.005 is usually fine) and that objects actually fall asleep after landing. If a fragment sits on an uneven surface and micro-vibrates, it will never sleep. Fix this by setting torque to zero and forcing rigidbody.Sleep() via a coroutine with a velocity threshold check.

Pooling. Debris objects should return to an Object Pool, not be destroyed via Destroy(). Destroy() triggers GC allocation, causing a frame spike exactly at the moment of explosion — when performance is already under load. A pool with a fixed maximum of 50-100 fragments and LRU eviction (oldest deactivated when out) is the standard pattern.

Why is pre-broken geometry cheaper than realtime?

Realtime fracturing (Voronoi mesh splitting on impact) looks nice in demos but is expensive in production. On PC it's acceptable for rare events (explosion every 30 seconds); on mobile it's practically unacceptable.

Industry standard: pre-broken geometry. The object is pre-fractured into fragments in a DCC tool (Blender Fracture Modifier, 3ds Max ProBoolean, or specialized tools like RayFire). All fragments exist in the scene from the start, but without Rigidbody, either Kinematic or static. On explosion: enable Rigidbody, apply AddExplosionForce, fragments fly apart.

Explosion Force in Unity: Rigidbody.AddExplosionForce(force, explosionPos, radius, upwardsModifier). upwardsModifier is an important often-overlooked parameter. It adds a vertical component to the force, making the explosion more 'upward' rather than purely radial. A value of 0.5–1.0 creates a more cinematic look.

For large objects (building, wall), fragments can be hierarchical: large pieces break into smaller ones on landing via secondary fracture triggers.

Cloth Simulation as part of a rigid body scene

PhysX in Unity has a Cloth component for Skinned Mesh Renderers — soft body simulation. Flags in the wind, character capes, ropes — all Cloth. Integrating Cloth with Rigidbody is common: a flag attached to a pole that falls as a Rigidbody.

Cloth Constraint — fixed particles (vertices pinned to a transform) and free ones. When the pole falls: the Constraint Target transforms with the pole's Rigidbody, cloth follows. Limitation: Unity Cloth does not support collision with dynamic Rigidbodies — only with spheres and capsules set via cloth.capsuleColliders and cloth.sphereColliders. That means cloth won't correctly interact with debris — need either primitive approximation or fake via animation.

Cloth Parameter Recommended Value Performance Impact
Max Distance 0.0 (off) Maximum stretch
Surface Drag 0.1–0.5 Damping motion
Bending Stiffness 0.1–0.3 Fabric stiffness

Ragdoll and Active Ragdoll for characters

Ragdoll is a set of Rigidbodies + Joints on the character skeleton, activated on death or fall. The standard Unity Ragdoll Wizard creates a basic structure, but the result needs fine-tuning.

Key problems with default ragdoll:

  • ConfigurableJoint with too-broad angular limits → limbs fold into physically impossible positions
  • Small Rigidbodies (fingers, feet) with low mass → physics solver instability, jitter
  • Transition from Animator to Ragdoll is visible as a 'snap' in pose

Active Ragdoll — a hybrid approach: the Animator continues to work, but Rigidbody joints apply force to follow animated poses. In Unity this is achieved via ConfigurableJoint.targetRotation = difference between current joint rotation and target from Animator. The weight of physics vs animation is controlled by Joint.slerpDrive.positionSpring. This gives procedural falling while retaining animation control — the character 'fights' physics instead of instantly becoming a limp doll.

Our process and what's included

We provide a turnkey service: analyze the scene, design the architecture, implement physics, and run stress tests. Pricing is determined individually per project.

Included in the work Description
Physics architecture Selecting approach (pre-broken, realtime), collider setup
Debris implementation Object Pool, AddExplosionForce, sleep optimization
Ragdoll tuning Joint limits, active ragdoll blend
Cloth integration Constraint setup, collision proxies
Documentation Architecture description, tuning instructions
Technical support 2 weeks after implementation
Task type Estimated timeline
Debris system (pre-broken, 20-50 fragments) 3-5 days
Ragdoll tuning for a character 2-4 days
Active Ragdoll with animation/physics blend 5-10 days
Full destructible environment system 2-4 weeks

We'll evaluate your project in one day. Contact us and we'll send a commercial proposal with stages and a result guarantee. Our experience: over 5 years in game development, more than 30 completed projects. Saving debugging time on physics is one of the key results for our clients. Get a consultation if you want to avoid typical mistakes.

How to distinguish a working shader from a failed one?

A programmer adds water to a scene and gets a blue rectangle. The Asset Store delivers an outdated asset with artifacts on mobile. Shader development is not just applying a texture—it’s a complex engineering task: you need to understand the depth buffer, sample normals in multiple layers, and organize foam at intersections with geometry. Without this, the shader either doesn’t work or kills FPS.

Our team has been engineering shaders and VFX for over five years—during this time, we’ve worked on dozens of projects from indie to AAA. Once, a client brought a water scene from the Asset Store: on a mobile device, it ran at 12 FPS due to missing LOD and incorrect batching. We rewrote the shader for URP and achieved 60 FPS while preserving the visuals.

URP vs HDRP: What should you choose for your project?

The choice of Render Pipeline is fixed at the start—shaders for HDRP do not work in URP and vice versa. Evaluate the trade-offs based on the table:

Parameter URP HDRP
Target platforms Mobile, PC, consoles PC, consoles (High-end)
Performance Low overhead, up to 40% faster on mobile High load, photorealistic
Screen Space Reflections Limited (since version 14) Full with settings
Volumetric Fog Via custom Built-in system
Water System Absent Built-in
ShaderGraph nodes Basic set Extended (Diffusion Profile, Eye)

Conclusion: URP provides up to +40% FPS on mobile devices compared to HDRP. For a mobile RPG, we chose URP—on an iPhone 8, we got stable 60 FPS without quality loss. HDRP is justified on PC/consoles where photorealism and the built-in Water System are needed.

How to develop shaders in ShaderGraph: from water to vegetation

ShaderGraph is a node-based editor without HLSL, but understanding "under the hood" is essential. Let’s break down a water shader—it includes several techniques.

Normal motion. Two layers of normal maps sampled at different speeds and directions:

Time → Multiply (speed1) → Add → Sample Texture 2D (normalMap)
Time → Multiply (speed2) → Add → Sample Texture 2D (normalMap)
→ Normal Blend → Normal (fragment shader)

Two opposing directional layers create the effect of running waves without tiling periodicity. Consumption: 2 texture samples, which fits within the budget of 40 draw calls for a water surface.

Depth and foam. Using the Scene Depth node (opaque texture must be enabled in URP/HDRP), we get the difference between the scene depth and the water fragment’s position. Shallow depth (intersection with the shore) → foam via Step/Smoothstep. Deep depth → more saturated blue, higher opacity. Foam adds 1-2 ms on GPU but provides a realistic shoreline.

Refraction. Scene Color + UV offset by normal map—the bottom "swims". Water is rendered in the Transparent queue, after all opaque geometry. Be sure to enable Opaque Texture in URP settings, otherwise refraction won’t work.

Fresnel and reflections. Fresnel Effect node—near the camera normal, the surface is more transparent; at sharp angles, it reflects. Physically correct for dielectrics. A cubemap or Reflection Probe is added on top of the Fresnel mask. On mobile platforms, replace Reflection Probe with a low-resolution cubemap (128x128)—saving 1-2 ms.

Vegetation shader. Animating bushes and grass without physics simulation—via vertex shader. In ShaderGraph: take vertex XZ coordinates as phase shift, Time → Sine with different phases, multiply by Vertex Color channel R (white = swaying, black = fixed to ground). Result: grass sways in waves, base remains fixed. For "wind when the player runs," add a CPU parameter _PlayerPosition. Such a shader handles 100,000 vertices in 0.3 ms on an iPhone 11.

The original asset used 4 normal map layers and dynamic cubemap reflections—on mobile, it delivered 12 FPS. After rewriting for URP with two layers, simplified foam, and baked reflections, we achieved 60 FPS. Development time saved: 1 day instead of 3 days for asset adaptation.

VFX Graph: How to manage millions of particles on GPU

VFX Graph runs entirely on GPU via Compute Shaders. Unlike Particle System (Shuriken), which works on CPU, here you can manage millions of particles without CPU load. Example: an explosion with shrapnel (200 particles) on GPU takes 0.05 ms, while a CPU Particle System of the same complexity takes 0.8 ms.

The graph is divided into contexts: Spawn (burst, constant rate, event trigger), Initialize (initial attributes), Update (gravity, turbulence, collisions), Output (Quad, Mesh, Lit/Unlit, Distortion).

Example: explosion with shrapnel

Spawn: Single Burst (count: 200)
  ↓
Initialize:
  Position: Sphere Volume (radius: 0.1)
  Velocity: Spherical * Random(5, 15)
  Size: Random(0.05, 0.3)
  Lifetime: Random(0.5, 2.0)
  Color: Gradient by lifetime (white → orange → gray)
  ↓
Update:
  Gravity (force: -9.8)
  Drag (coefficient: 0.2)
  Turbulence (intensity: 2.0)
  Collision (Scene SDF or Depth Buffer)
  ↓
Output Quad (Unlit):
  Texture: spark
  Blend Mode: Additive

Turbulence uses Noise Field—3D noise, particles deviate organically. Flipbook animations in the Output context—sprite animation for each particle.

How to optimize VFX for mobile platforms?

For mobile devices, reduce particle count to 50 and disable Collision—saving 3 ms. Use GPU instancing with VFX Graph’s automatic instancing: the same explosion effect on iPhone 11 runs at 0.02 ms per burst, which is 2.5x faster than a CPU-bound setup. Also enable particle LOD via Quality Levels in VFX Graph: lower particle counts on medium-spec devices while keeping visual fidelity on high-end.

Why does post-processing require platform-specific tuning?

Post-processing—effects applied to the final image after main rendering. In Unity via the Volume system (Local/Global Volume). Typical stack for an action project:

Effect Purpose Notes
Bloom Glow of bright sources Threshold 0.8, intensity 0.5—saves 1 ms
Tonemapping ACES filmic for realism, Neutral for stylization Standard for realistic projects
Color Adjustments Contrast +10%, saturation +5% Tweak to mood
Vignette Darken edges Intensity 0.3—focuses on center
Motion Blur Blur along motion vector Disable on mobile—saves 2 ms GPU
Depth of Field Bokeh Careful in VR—breaks depth perception
Screen Space Ambient Occlusion SSAO / HBAO Darkens geometry corners, +1.5 ms

For mobile platforms, we disable Motion Blur and SSAO, reduce Bloom to 2-3 passes—final post-processing budget of 3-4 ms. On PC/HDRP, the stack can take 8-10 ms, but this is compensated by GPU power.

What deliverables do you get?

  • Custom shader development in ShaderGraph (URP/HDRP): water, vegetation, character effects, holograms, dissolve.
  • VFX Graph effects: explosions, fire, smoke, magic, environment. Maximum performance—up to 2 million particles on GPU at 60 FPS.
  • Setting up and optimizing Particle System (Shuriken) for mobile platforms: replacing with GPU instancing reduces draw calls by 70%.
  • Building a Post-Processing stack aligned with the project’s visual style, with render time measurement.
  • Porting shaders between URP and HDRP when changing pipeline: average time 0.5-1 day per shader.
  • Optimizing VFX for the target platform: GPU instancing, particle LOD, culling.

Deliverables include shader and VFX graph source files, setup documentation, team training (1 hour consultation), and support for one month after delivery. We’ll evaluate your project in one business day—contact us. Get a consultation for your project—we’ll find the optimal solution and provide timelines.

What is our experience and guarantees?

Over 5 years in game development, 50+ projects (mobile, PC, consoles). We guarantee that the shader will work on the target platform at the stated FPS—if not, we rework it for free. Example: for one indie studio, we rewrote all shaders for URP—FPS on iPhone 8 increased from 25 to 60, and the render time budget decreased by 40%. We use the latest stable versions of Unity (LTS) and Unreal Engine 5, working with Vulkan, Metal, DirectX 12.

Comparison: a ready-made asset from the Asset Store often requires rework (compatibility, performance)—custom shader development is 2-3 times faster in terms of time than adapting someone else’s code. And a shader written from scratch for your tasks gives you 100% control over performance and visuals. Budget savings on one project can reach 30% due to the absence of unnecessary code.

What are the work stages?

  1. Analysis: examine the scene, target platforms, FPS requirements. Capture visual references.
  2. Prototyping: create shader/VFX graph, test on reference device.
  3. Integration: embed into the project, adjust parameters, optimize draw calls and batching.
  4. QA: test on all target platforms (Android, iOS, PC, consoles), fix artifacts.
  5. Deployment and handover: deliver source files, documentation, conduct training. Support for 1 month.

Timeline: 2 to 10 business days depending on complexity. Cost is calculated individually—write to us, we’ll evaluate your project. Order shader development—get a ready result with performance guarantee.